4.9 KiB
| title | layout |
|---|---|
| Solaar Usage | page |
Solaar usage
Under normal usage Solaar creates an icon in your system tray. This icon is usually a battery icon showing the approximate battery level for your device with the lowest known battery level. If there is no battery information to show the icon is one of the Solaar icons.
Solaar also has a main window. To show the main window if it is not visible click on the icon in the system tray to bring up the Solaar menu and then click on a receiver or device in the menu.
Here is an image of the Solaar menu and the Solaar icon (here the battery symbol in the system tray at the left of the image ). The Solaar icon can also be other battery icons or versions of the Logitech Unifying icon.

Clicking on "Quit" in the Solaar menu terminates Solaar. Clicking on "About Solaar" pops up a window with information on Solaar.
Solaar options
There are several options that affect how Solaar behaves:
--helpshows a help message and then quits---window=showstarts Solaar with the main window showing---window=hidestarts Solaar with the main window not showing---window=onlystarts Solaar with no system tray icon and the main window showing--battery-icons=symbolicuses symbolic icons for battery levels
Solaar main window
The Solaar main window shows your Logitech receivers and devices that Solaar knows about and can be used to pair new devices, unpair paired devices, and view and change some settings of the selected receiver or device. To select a receiver or device click on it in the left side of the window.
Closing the main window does not terminate Solaar (unless Solaar is not using the system tray). Clicking on "Quit Solaar" terminates Solaar. Clicking on "About Solaar" pops up a window with information on Solaar. Clicking on the lightbulb (or similar icon) displays detailed information about the selected receiver or device (mostly only useful for debugging).
Pairing and unpairing devices
When a receiver is selected in the main window you can pair a new device by clicking on the "Pair new device" button. Then turn on the device and it should pair with the receiver if that is possible.
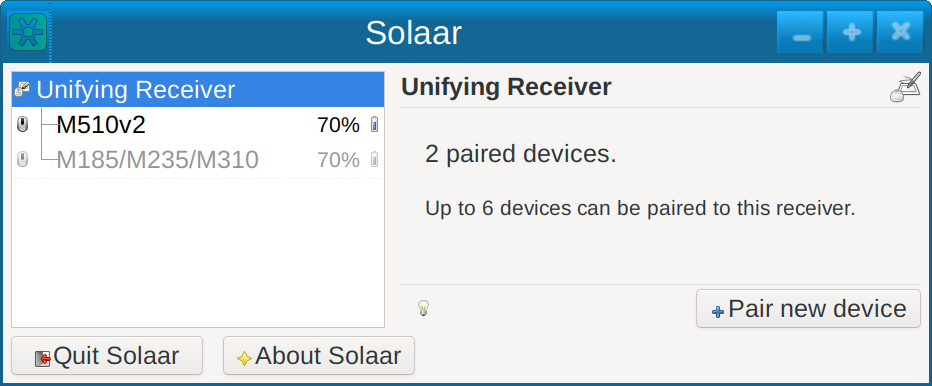
Some receivers can only pair with certain kinds of devices. Some receivers pair a new device by replacing an existing paired device of the same kind. Some receivers can only pair a limited number of times. A receiver with the Unifying logo should be able to pair with any device with the Unifying logo. If there are no open pairing slots, however, you may not be able to pair a new device. In this case to pair a new device you first need to unpair a device.
When a device is selected you can unpair the device if your receiver supports unpairing. To unpair the device, just click on the "Unpair" button and confirm in the window that pops up.
Viewing and changing device settings
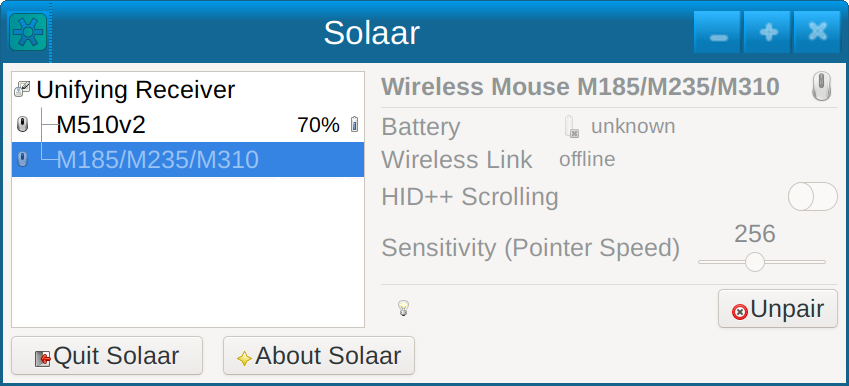
When a device is selected you can see the approximate battery level of the device, if that is reported by the device, and the status of the link between the device and its receiver. You can also see some settings of the device and change some of these. Changing settings is performed by clicking on buttons or moving sliders.


If the selected device is off or otherwise disconnected its settings cannot be changed but it still can be unpaired if its receiver allows unpairing.
Reprogramming key and button actions
For many devices Solaar can reprogram some of their keys or buttons to perform a different action. (This actually changes the information that the device sends when the key or button is activated.) Only some keys on some devices can be reprogrammed and they can only be reprogrammed to a limited number of actions. The reprogramming is done in Solaar by selecting a key or button in the left-hand box on the ``Action'' setting line and then selecting the action to be performed in the right-hand box. The default action is always the shown first in the list. If the key or button has not been reprogrammed the action box will be blank. As with all settings, Solaar will remembers past action settings and restore them on the device from then on.
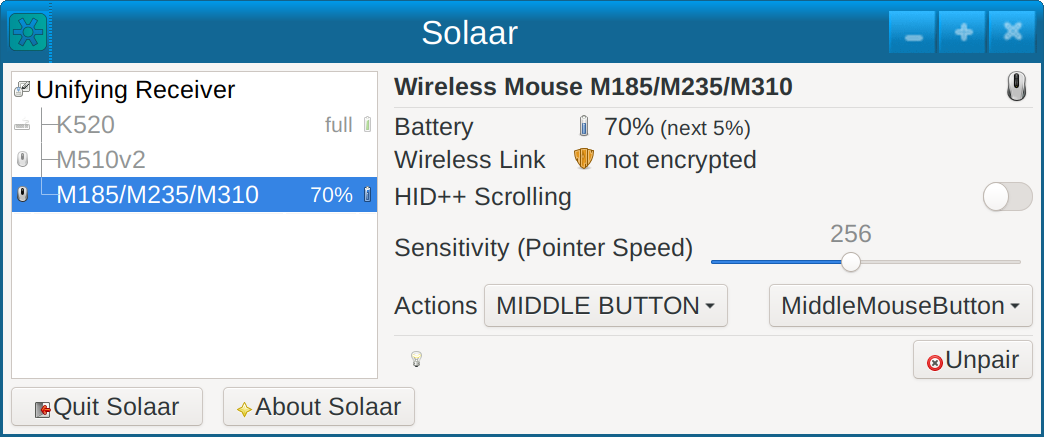
The names of the keys, buttons, and actions are mostly taken from Logitech documentation and may not be completely obvious.
Solaar command line interface
Solaar also has a command line interface that can do most of what can be
done using the Solaar main window. For more information on the Solaar
command line interface, run solaar --help to see the Solaar commands and
then solaar <command> --help to see the arguments to any of the commands.